


Get the grill ready for a Mediterranean-inspired menu fit for entertaining outdoors
One of our favorite rituals of spring is to grill and entertain outside, and this Greek-themed menu is perfect for such occasions. It can be dressed up or dressed down, depending on your guest list, and it’s a crowd-pleaser for friends and family of all ages. It is also a budget-friendly menu that can easily be doubled to feed a big crew. As always, most of the meal can be prepared well in advance, leaving you plenty of time to relax and enjoy the party.
THE MENU
Recipes by Tracey Koch
• Hummus
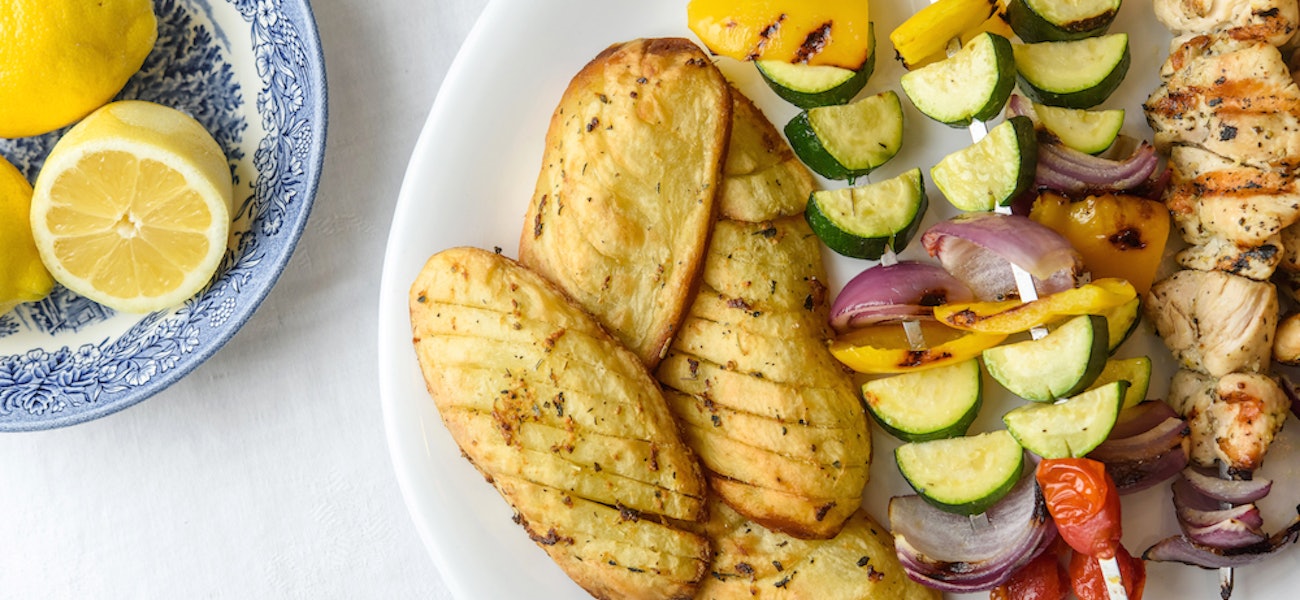
• Chicken and Vegetable Kabobs with Lemon, Garlic and Herbs
• Baklava
• Greek-style Roasted Potatoes
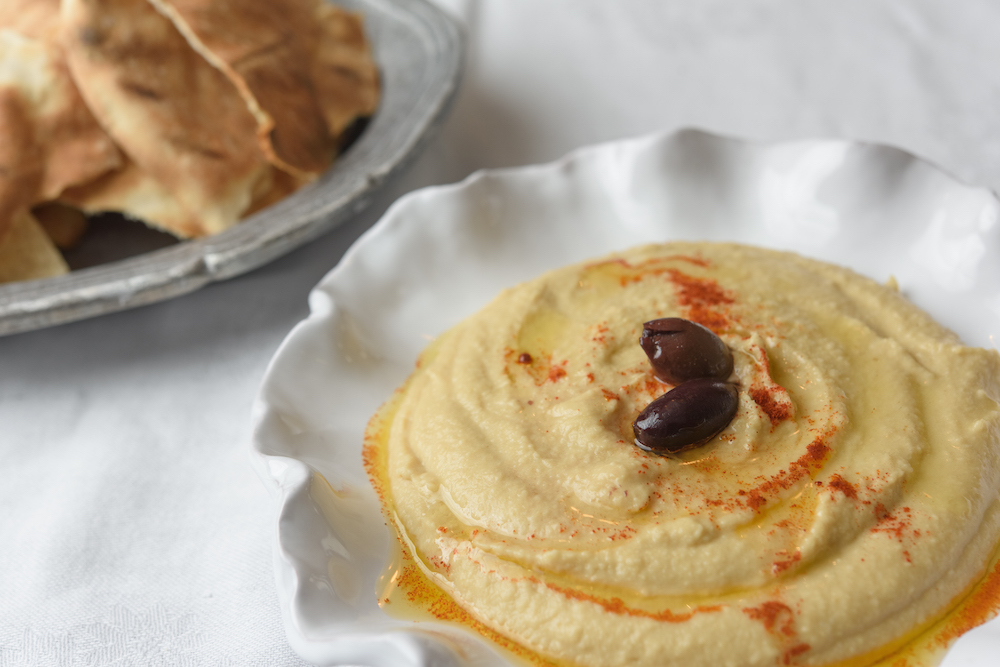 Hummus
|
|
|
If you have never made your own hummus, you should give this recipe a try. It is really quite simple and fun to do. Feel free to adjust the recipe and add more lemon or tahini paste to it. Tahini is a sesame seed paste that is readily available in the ethnic section of most grocery stores. This hummus recipe is very light and is delicious as a dip with pita, veggies or to dollop on top of the kabobs. Use the leftovers as a spread for a killer sandwich.
Yields: 3 cups
2 (15-ounce) cans chickpeas (garbanzo beans)
2 cups water
½ teaspoon kosher salt
¼ teaspoon cumin
2 tablespoons fresh lemon juice
1 clove minced fresh garlic
3 tablespoons tahini paste
1 tablespoon olive oil
Pinch of paprika
1. In a 2-quart pot, combine the chickpeas, water, salt, cumin and lemon juice. Bring to a boil.
2. Reduce the heat and simmer for 20 minutes or until the chickpeas are very soft. Turn off the heat and allow everything to cool completely.
3. In the bowl of a food processor or blender, combine the cooled chickpeas (with the cooking liquid), garlic and tahini. Puree until everything is smooth.
4. Place the hummus into an airtight container and chill for an hour before serving. To serve, drizzle with the tablespoon of olive oil and pinch of paprika. Store leftover hummus in an airtight container in the refrigerator for up to one week.
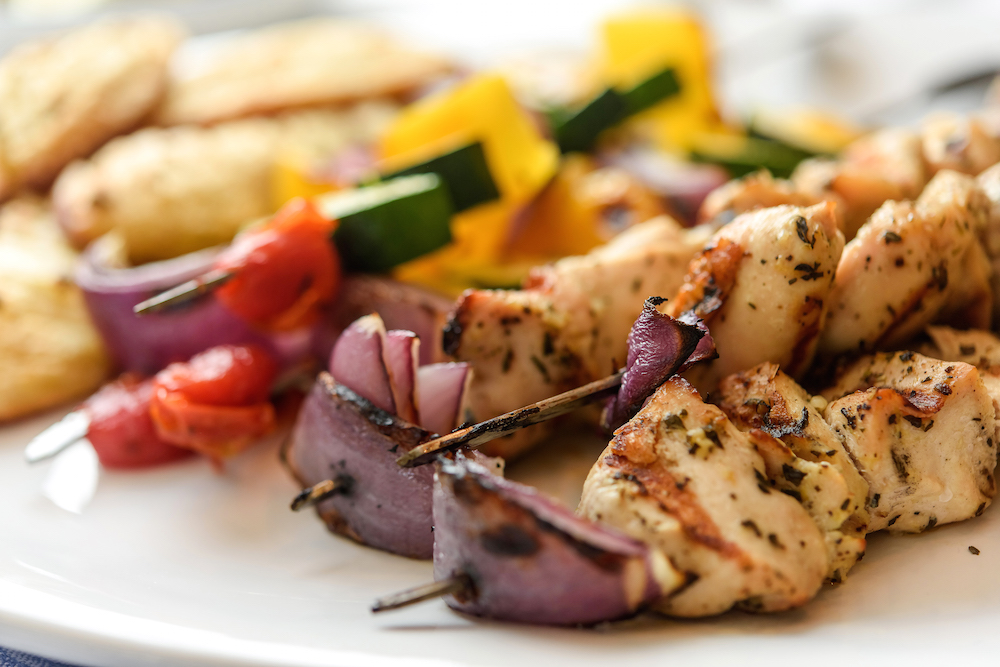 Chicken and Vegetable Kabobs with Lemon, Garlic and Herbs
We have both been making kabobs for more than 20 years, and this marinade is our favorite. It is tangy, garlicky and delicious. We have used this marinade over shrimp as well, making it very versatile. We do recommend skewering the chicken and vegetables separately from each other, because the cooking times are different. That way, you can make sure the chicken is fully cooked without overcooking the vegetables.
Servings: 6
For the marinade:
2 cloves fresh minced garlic
¼ teaspoon dried oregano
¼ teaspoon dried mint
1 tablespoon fresh chopped parsley
3 tablespoons fresh lemon juice
1 tablespoon lemon zest
½ cup olive oil
1 teaspoon kosher salt
¼ teaspoon black pepper
Whisk together all the ingredients and set them aside.
For the kabobs:
6 boneless, skinless chicken breasts
1 large red onion
2 yellow bell peppers
3 medium zucchini
1 cup cherry tomatoes
12 metal skewers
1. On a cutting board, cut the chicken breasts into cubes and place them in a bowl.
2. Using a separate cutting board, cut up the red onion, bell peppers and zucchini into pieces that can easily be skewered.
3. Divide the red onion pieces, placing half into the bowl with the chicken and the other half into a separate bowl along with the rest of the cut vegetables and cherry tomatoes.
4. Pour half the marinade over the chicken and the rest over the vegetables. Toss to coat. Allow everything to marinate for at least 1 hour.
5. Heat the grill to 350 degrees. Thread 6 of the skewers with the chicken and red onions and the other 6 with the vegetables.
6. Grill the chicken and onion skewers 5 to 6 minutes per side or until the chicken is cooked through. Remove them from the grill and cover with aluminum foil to keep warm.
7. Grill the vegetable skewers 3 to 4 minutes per side. Remove them from the grill and serve along with the chicken kabobs.
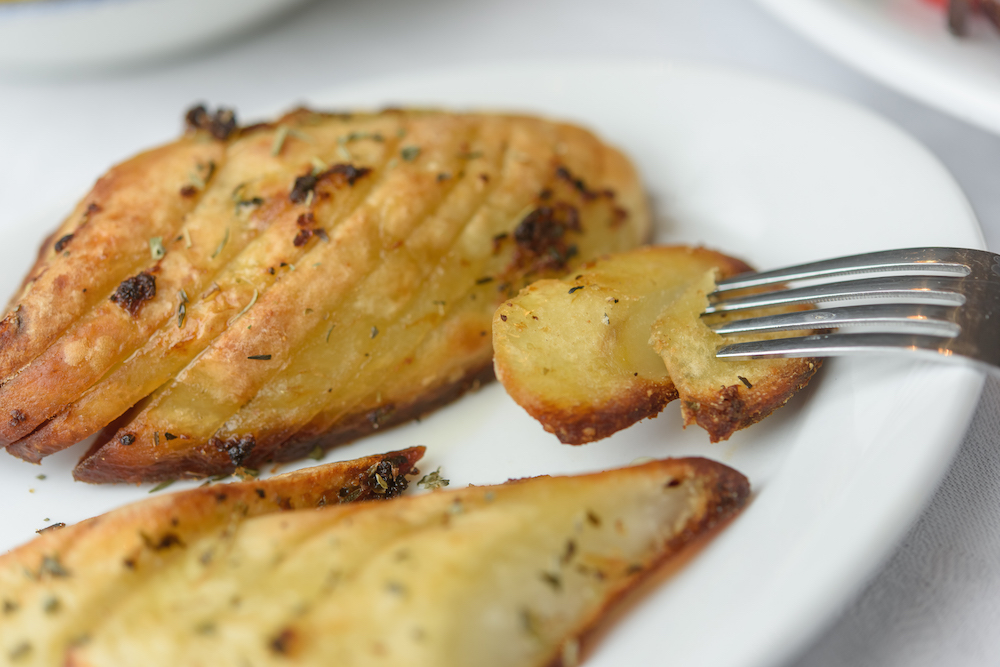 Greek-style Roasted Potatoes
This potato dish is one of our favorites to make any time we are grilling meats. It goes with everything from grilled fish and shrimp to steaks, pork, chicken and lamb. The potatoes can be prepped ahead of time and then popped in the oven 30 minutes before serving. Their texture is crispy on the outside and tender and creamy on the inside.
Servings: 6
3 large baking potatoes
½ cup olive oil
1 clove minced garlic
1 tablespoon lemon zest
¼ teaspoon dried oregano
¼ teaspoon dried thyme
2 tablespoons fresh lemon juice
Salt and pepper
1. Bring two quarts of salted water to a rolling
boil. Peel the potatoes, cut them in half lengthwise and blanch them in the boiling water for 2 to 3 minutes. Drain them well and pat dry.
2. Heat the oven to 375 degrees. Rub a baking sheet
with one tablespoon of the olive oil.
3. Combine the remaining olive oil with the rest
of the ingredients and whisk to incorporate everything.
4. Place the potatoes on a cutting board. Using a
sharp paring knife, cut ¼-inch slits on the bias through the potatoes. Make sure that the cuts go most of the way through but still keep the potato intact.
5. Set the potato halves onto the greased baking sheet and brush each half with the olive oil mixture. Roast the potatoes
for 30 to 35 minutes or until they are golden and crisp on the outside and tender and creamy on the inside. Serve with the kabobs.
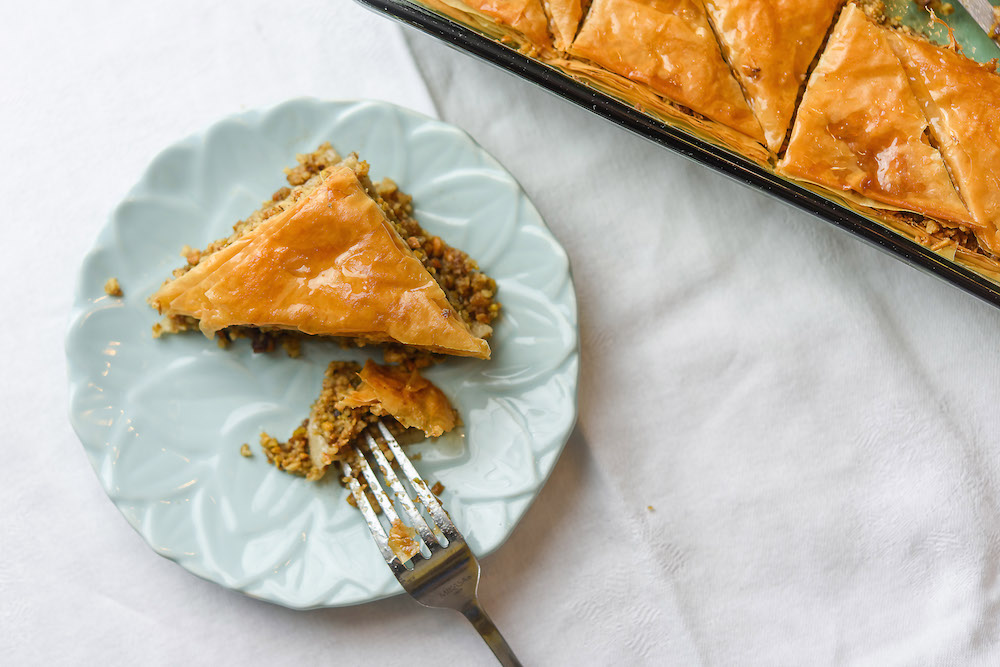 Baklava
We think this is by far one of the best baklava recipes. Tracey has perfected it, and it is both authentic and delicious. Be mindful that working with phyllo dough can be difficult, to say the least. However, it is worth a little frustration, because the end result is so good. We suggest having an extra box of phyllo to work with as backup, just in case, because the sheets in some boxes of phyllo tear more easily than in others. We also recommend thawing the phyllo in the refrigerator overnight. This seems to help prevent the delicate, thin layers of the phyllo from sticking together as you are working with them.
Yields: 24 pieces
1 box frozen phyllo dough
2 sticks butter
3 cups raw walnuts
1 cup unsalted pistachios
1 teaspoon cinnamon
1 cup sugar
1 cup water
1 tablespoon lemon peel
1 tablespoon orange peel
½ cup honey
1. Melt the two sticks of butter and allow them to cool slightly. Heat the oven to 350 degrees.
2. In a food processor, combine the walnuts and pistachios and blend until finely chopped. Pour the nut mixture into a bowl and stir in the cinnamon.
3. Remove the thawed phyllo from the package and gently unroll it. Place a damp kitchen towel on top of the phyllo to prevent it from drying out.
4. Place one sheet of phyllo onto a large cutting board and brush it with the melted butter. Repeat this step to create 10 to 12 layers of dough, buttering in between each layer. Remember to keep replacing the damp kitchen towel over the remaining phyllo to keep it from drying out. (If the phyllo tears as you are working with it, piece it together by pressing it down lightly and using the melted butter to help bind it.)
5. Trim the sides of the phyllo dough to fit in the bottom of a 9-by-13-inch baking dish and then press the buttered layers down in the bottom of the dish.
6. Pour half of the nut mixture over the buttered layers and spread it out evenly.
7. Butter an additional 6 to 8 sheets of phyllo and trim them to fit on top of the layer of nuts. Place that second layer of phyllo on top of the nuts and top it with the second half of the nut mixture. Spread this layer out evenly.
8. Butter an additional 6 to 8 sheet of phyllo and use this final layer to top the baklava.
9. Use a sharp knife to cut the unbaked baklava into 1½-inch-wide strips. Then cut diagonally to create a diamond shape. Make sure the knife cuts all the way through the pastry.
10. Bake for 25 to 35 minutes.
|
|
|
11. While the baklava is baking, combine the sugar, water, lemon peel and orange peel together and bring to a boil. Keep stirring the mixture until the sugar is completely dissolved. Once the sugar is dissolved, reduce the heat and simmer for 5 minutes.
12. Remove the syrup from the heat and stir in the honey. Allow this mixture to cool completely. Discard the lemon and orange peel from the syrup.
13. The baklava is ready when golden brown. Remove it from the oven and immediately pour the syrup over the hot baklava. Allow it to cool completely. Baklava should be made several hours before serving. Store leftover baklava in an airtight container for up to 5 days.